Embarking on the journey of container orchestration with Kubernetes can feel like diving into a complex new world. But fear not! If you’re looking to grasp Kubernetes pods deployments & services explained in a clear and concise way, you’re in the right place. Understanding these core building blocks is your key to unlocking Kubernetes’ power, whether you’re exploring Kubernetes basic concepts or diving deep into its architecture for beginners. We’ll break down these fundamental Kubernetes objects and make them crystal clear.
The Humble Kubernetes Pod: Your Container’s Home
At its most fundamental level, a Kubernetes Pod is the smallest deployable unit that you can create and manage. Think of it as a logical host for your container(s). A pod encapsulates an application, its storage resources, an optional shared network namespace, and other configuration details. While a pod can contain multiple containers, it’s most common to see a single container within a pod.
Why multiple containers in a pod? This is typically for tightly coupled helper processes that need to share resources and communicate very closely. A classic example is a “sidecar” container that handles logging, monitoring, or acts as a network proxy for the main application container.
Key characteristics of a Pod:
- Shared Network Namespace: All containers within a pod share the same IP address and port space. They can communicate with each other using `localhost`.
- Shared Storage: Pods can specify a set of shared storage volumes that are accessible to all containers within the pod.
- Atomic Unit: While a pod can have multiple containers, it’s treated as a single unit. If a pod dies, all its containers die with it.
- Ephemeral: Pods are designed to be ephemeral. They are meant to be created, destroyed, and replaced by Kubernetes in response to changes or failures.
Here’s a simple example of a Pod definition using YAML:
apiVersion: v1
kind: Pod
metadata:
name: my-nginx-pod # The name of our pod
labels:
app: nginx # Labels are key-value pairs used for organizing and selecting objects
spec:
containers:
- name: nginx-container # The name of the container within the pod
image: nginx:latest # The Docker image to run
ports:
- containerPort: 80 # The port the container listens on
# Optional: Define resource requests and limits for better scheduling and stability
    # resources:
    #   requests:
    #     memory: "64Mi"
    #     cpu: "250m"
    #   limits:
    #     memory: "128Mi"
    #     cpu: "500m"
Kubernetes Deployments: Managing Your Application’s Lifecycle
While pods are the basic units, managing them directly can be tedious, especially when you need to update your application, scale it, or ensure high availability. This is where Kubernetes Deployments come in. A Deployment is a higher-level abstraction that manages the state of your application. It tells Kubernetes how to create, update, and maintain your pods.
What can Deployments do for you?
- Declarative Updates: You define your desired application state (e.g., which container image to use, how many replicas you want), and the Deployment controller works to bring the current state into alignment with the desired state.
- Rolling Updates: Deployments allow you to update your application with zero downtime. They do this by gradually replacing old pods with new ones, ensuring that your application remains available throughout the update process.
- Rollbacks: If a new deployment goes wrong, you can easily roll back to a previous known-good version.
- Scaling: You can easily scale your application up or down by changing the `replicas` field in your Deployment.
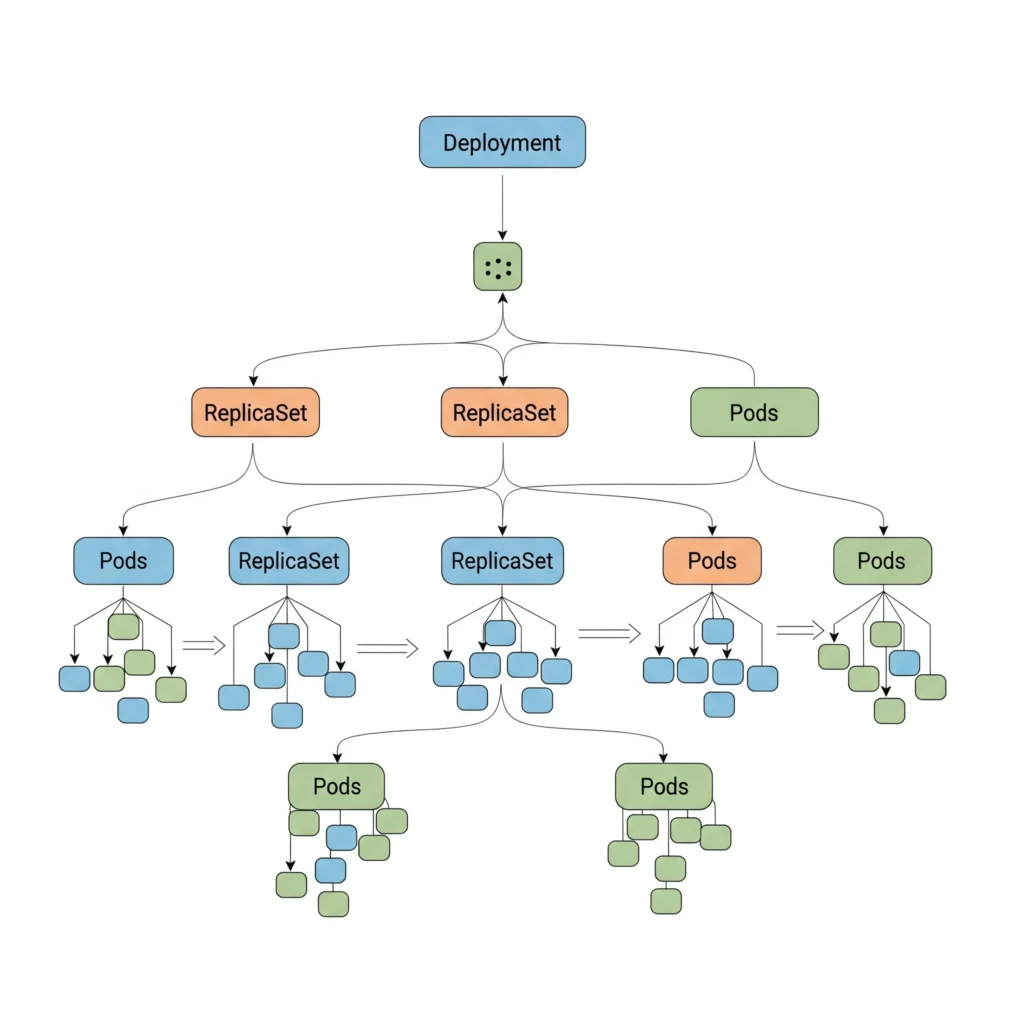
A Deployment doesn’t directly run your pods; instead, it manages a ReplicaSet. A ReplicaSet ensures that a specified number of pod replicas are running at any given time. When you update a Deployment, it creates a new ReplicaSet and gradually scales down the old one.
Let’s look at a typical Deployment manifest:
apiVersion: apps/v1
kind: Deployment
metadata:
name: my-nginx-deployment # Name of the Deployment
labels:
app: nginx # Labels for the Deployment itself
spec:
replicas: 3 # Desired number of pod replicas
selector:
matchLabels:
app: nginx # How the Deployment finds which pods to manage
template:
metadata:
labels:
app: nginx # Labels for the pods created by this Deployment
spec:
containers:
- name: nginx-container
image: nginx:latest
ports:
- containerPort: 80
In this example, the `replicas: 3` tells Kubernetes to ensure that three instances of the `my-nginx-pod` are always running. The `selector` field is very important; it links the Deployment to the pods it should manage based on their labels.
Kubernetes Services: Your Application’s Network Doorway 🚪
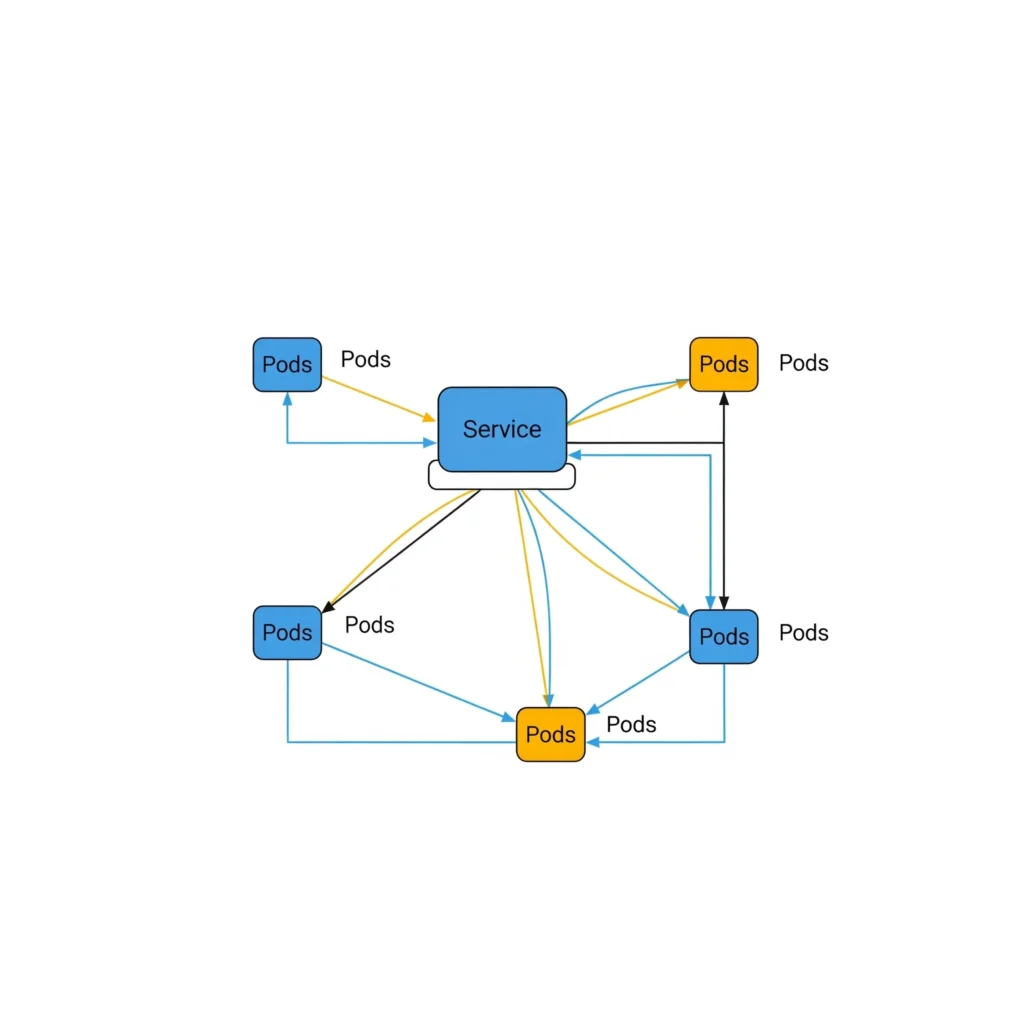
So, you’ve got your pods running, managed by Deployments. But how do other applications, or even users, access your running application? This is where Kubernetes Services come into play. A Service is an abstraction that defines a logical set of pods and a policy by which to access them. It provides a stable IP address and DNS name that can be used to access the pods, even as they are created, destroyed, and rescheduled.
Why are Services so important?
- Stable Endpoint: Pods are ephemeral and their IP addresses can change. A Service provides a stable IP and DNS name that doesn’t change, even if the underlying pods are replaced.
- Load Balancing: Services automatically distribute network traffic across the pods that match their selector. This ensures that no single pod is overwhelmed and improves the resilience of your application.
- Decoupling: Services decouple the frontend (how applications access your backend) from the backend (your pods). This makes it easier to update and scale your application without affecting how it’s accessed.
Different Types of Services and When to Use Them
There are different types of Services, each with its own purpose:
ClusterIP(default): Exposes the Service on an internal IP in the cluster. This is the most common type and is only reachable from within the cluster. Ideal for internal services that other applications within your cluster need to access, like a backend API or a database service.NodePort: Exposes the Service externally using a static port on each Node’s IP address. This makes the Service accessible from outside the cluster via any Node’s IP and the specified port. Useful for development or testing, or when you need a simple way to expose a service directly from a node’s IP, though less common for production internet-facing services.LoadBalancer: Exposes the Service externally using a cloud provider’s load balancer. This will provision an external IP address that acts as the entry point for your service. This is usually the preferred method for exposing services to the public internet in a cloud environment, automatically handling external traffic distribution.ExternalName: Maps the Service to the contents of theexternalNamefield (e.g.,my.database.example.com), which returns a CNAME record. Handy for creating a stable alias within your cluster to an external service or database that resides outside of Kubernetes.
Service Definition Example (ClusterIP)
Here’s a Service definition that targets our Nginx pods, making them accessible from other applications within the cluster:
apiVersion: v1
kind: Service
metadata:
  name: my-nginx-service # Name of the Service
spec:
  selector:
    app: nginx # Selects pods with the label 'app: nginx'
  ports:
    - protocol: TCP
      port: 80       # The port the Service listens on
      targetPort: 80 # The port on the pod that the Service forwards to
  type: ClusterIP    # This is the default, but explicitly stated for clarity
This ClusterIP Service provides a stable internal IP and DNS name (my-nginx-service.default.svc.cluster.local) for any other pod in the cluster to reach our Nginx application.
Exposing to the Internet (LoadBalancer Example)
If you wanted to expose this Nginx application to the public internet using a cloud provider’s load balancer, the Service definition would simply change its type:
apiVersion: v1
kind: Service
metadata:
  name: my-nginx-external-service # A new name for clarity
spec:
  selector:
    app: nginx # Still targets pods with the label 'app: nginx'
  ports:
    - protocol: TCP
      port: 80       # The port the external load balancer listens on
      targetPort: 80 # The port on the pod that the Service forwards to
  type: LoadBalancer # Changed to LoadBalancer to provision an external IP
In this LoadBalancer example, your cloud provider would automatically provision an external load balancer, providing a public IP address that routes traffic to your my-nginx-external-service, which then distributes it among your Nginx pods.
Wrapping Up: Your Kubernetes Journey Continues 🚀
You now have a solid (or should I say SOLID?) grasp of Kubernetes Pods Deployments & Services – the fundamental building blocks for running containerized applications in a resilient and scalable manner. Understanding how these core objects work together is crucial for navigating the world of cloud-native development.
Remember:
- Pods are the smallest deployable units, housing your containers.
- Deployments manage the lifecycle of your Pods, ensuring desired states, enabling rolling updates, and facilitating scaling.
- Services provide stable network access to your Pods, abstracting away their ephemeral nature and offering built-in load balancing.
This is just the beginning! Kubernetes is a vast and powerful ecosystem. To continue your learning journey and deepen your expertise, we highly recommend exploring the following resources:
Further Reading & Official Documentation
- Official Kubernetes Concepts Overview: Dive deeper into Kubernetes’ foundational concepts directly on the official documentation site.
- Pods Official Documentation: For comprehensive details, refer to the official Pods documentation.
- Deployments Official Documentation: Understand the full power of Deployments in the Kubernetes official guide, including advanced update strategies.
- Services Official Documentation: Explore the different Service types and their networking implications on the official Kubernetes documentation.
kubectlReference Docs: Familiarize yourself withkubectl, the essential command-line tool for interacting with Kubernetes clusters.
Related Resources & Community
- Cloud Native Computing Foundation (CNCF): Discover more about the broader Cloud Native ecosystem and other open-source projects like Kubernetes from the CNCF, the vendor-neutral home for many fast-growing open-source projects.
- GitHub Gists: Learn how to create and share your own code snippets effectively with GitHub Gists, an invaluable tool for developers.
- Nginx on Docker Hub: Explore the official Nginx Docker image and many others on Docker Hub, the world’s largest library and community for container images.
We hope this guide has helped make these core Kubernetes concepts easily understandable for you. Happy containerizing!